Making histological sections for the light microscope.
Techniques
For light microscopy, three techniques can be used: the paraffin
technique, frozen sections, and semithin
sections.
The paraffin technique is the most commonly used. Once the sections
are prepared, they are usually stained, to help distinguish the components
of the tissue. Unstained, it's hard to make out much detail, because the
optical density of the different tissue components is very similar.
Section are prepared for the electron microscope using a method similar
to that for semithin sections.
What is the paraffin technique?
In this technique, tissues are fixed, and embedded in wax.
This makes the tissue hard, and much easier to cut sections from. The
sections are then stained, and examined with the light microscope.
1. Fixation:
Square tissue blocks (about 1cm in each dimension), or whole organs,
are fixed by chemical fixation:
The chemical added binds to and cross-links some proteins, and denatures
other proteins through dehydration. This hardens the tissue, and inactivates
enzymes that might otherwise degrade the tissue. Fixation also kills bacteria
etc. It can also enhance tissue staining.
The fixative most commonly used is a 4% aqueous solution of formaldehyde,
at neutral pH.
2. Dehydration and clearing:
To cut sections, the tissue has to be embedded in paraffin wax, but wax
is not soluble in water or alcohol. However, it is soluble in a paraffin
solvent called 'xylene'. Therefore, the water in the tissue needs to be
replaced with xylene. To do this, first the tissue has to be dehydrated,
by gradually replacing water in the sample with alcohol. This is achieved
by passing the tissue through increasing concentrations of ethyl alcohol
(from 0 to 100%). Finally, once the water has been replaced by 100% alcohol,
the alcohol is replaced with xylene, which is miscible with alcohol. This
final step is called 'clearing'.
3. Embedding:
The tissue is placed in warm paraffin wax, and the melted wax fills the
spaces that used to have water in them. After cooling, the tissue hardens,
and can be used to cut slices (sectioned).
4. Sectioning:
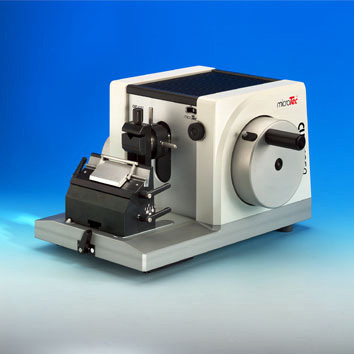
The tissue is trimmed, and mounted on a cutting device called a microtome
(shown in the picture). Thin sections are cut, which can be stained and
mounted on a microscope slide.
5. Staining and Mounting:
Unfortunately, most staining solutions are aqueous, so to stain the sections,
the wax has to be dissolved and replaced with water (rehydration). This is
essentially step 2 in reverse. The sections are passed through xylene,
and then decreasing strengths of alcohol (100% to 0%) and finally water.
Once stained, the section is then dehydrated once again, and placed in
xylene. It is then mounted on the microscope slide in mounting medium
dissolved in xylene. A coverslip is placed on top, to protect the sample.
Evaporation of xylene around the edges of the coverslip, dries the mounting
medium and bonds the coverlips firmly to the slide.
Are there any other ways of making sections for the light
microscope?
There are two further ways that are sometimes used:
Frozen sections:
Tissues are frozen rapidly in liquid nitrogen, and then cut in a refrigerated
cabinet (a cryostat) with a cold knife, then stained and observed in the
microscope. This procedure is faster, and can preserve some tissue details
that may be lost by the paraffin technique. Sections are 5 - 10 µm
thick.
Semithin sections:
It is sometimes hard to see detail in thick sections. To get around this,
sections can be embedded in epoxy or acrylic resin, which enable thinner
sections (less than 2 µm) to be cut.